Hosting a Static Website in AWS S3 with HTTPS and CDN
Over the weekend I decided to do a project in Three.js and host it online once it was finished.
Hosting a static website with https is something that I do frequently enough to need to know how to do it, but infrequently enough that I don’t remember all the steps every time. So I’m deciding to make a post to help myself and others.
The .app domain only works with https, which means that we’ll need to do a few extra steps to let users access our website.
This tutorial assumes that you know a little bit about the AWS console and are using Google domains as your domain name registrar.
So without further ado, let’s get started!
Create your bucket
In the AWS console go to the S3 dashboard.
S3 is a "bucket" service. Basically it's a file system hosted somewhere. Think of it as a Google Drive that can be accessed by anyone with the right credentials.
Create a new bucket.
Name the bucket the same thing as your website. For my example I am using “foxholemap3d.app”
In the ‘Block Public Access settings for this bucket’ box, uncheck “Block all public access”.
Acknowledge and accept the warning.
Create the bucket.
Click on the bucket you just created.
Click on the properties tab, scroll all the way down to “Static website hosting”. Click edit.
Check enable
Set index document to index.html
Save Changes.
Go to the permissions tab and edit the Bucket Policy. Set the bucket policy to the following, but change the resource url to the url of your website instead of foxholemap3d.app
{
    "Version": "2012-10-17",
    "Statement": [
        {
            "Sid": "PublicRead",
            "Effect": "Allow",
            "Principal": "*",
            "Action": [
                "s3:GetObject",
                "s3:GetObjectVersion"
            ],
            "Resource": "arn:aws:s3:::foxholemap3d.app/*"
        }
    ]
}
Repeat these steps for a second bucket, except this buckets name should be the same as the other one, just with www. before it. So for me this would be: www.foxholemap3d.app
This will be your secondary bucket.
Once your secondary bucket is created, go to its properties > Static website hosting and click edit. Enable static website hosting. Under hosting type, select Redirect Requests for an object. Put the name of your primary bucket as the domain name. Select https as the protocol. Click save.
This will route users from www.your-website.com to your-website.com
Now upload your files to the buckets. Make sure your main document is titled index.html.
Configure DNS Records
Go to the Route53 Dashboard. View hosted zones.
Click on “Create hosted zone”. Make sure your domain name is the same name as your website. Click on “create hosted zone” to save it.
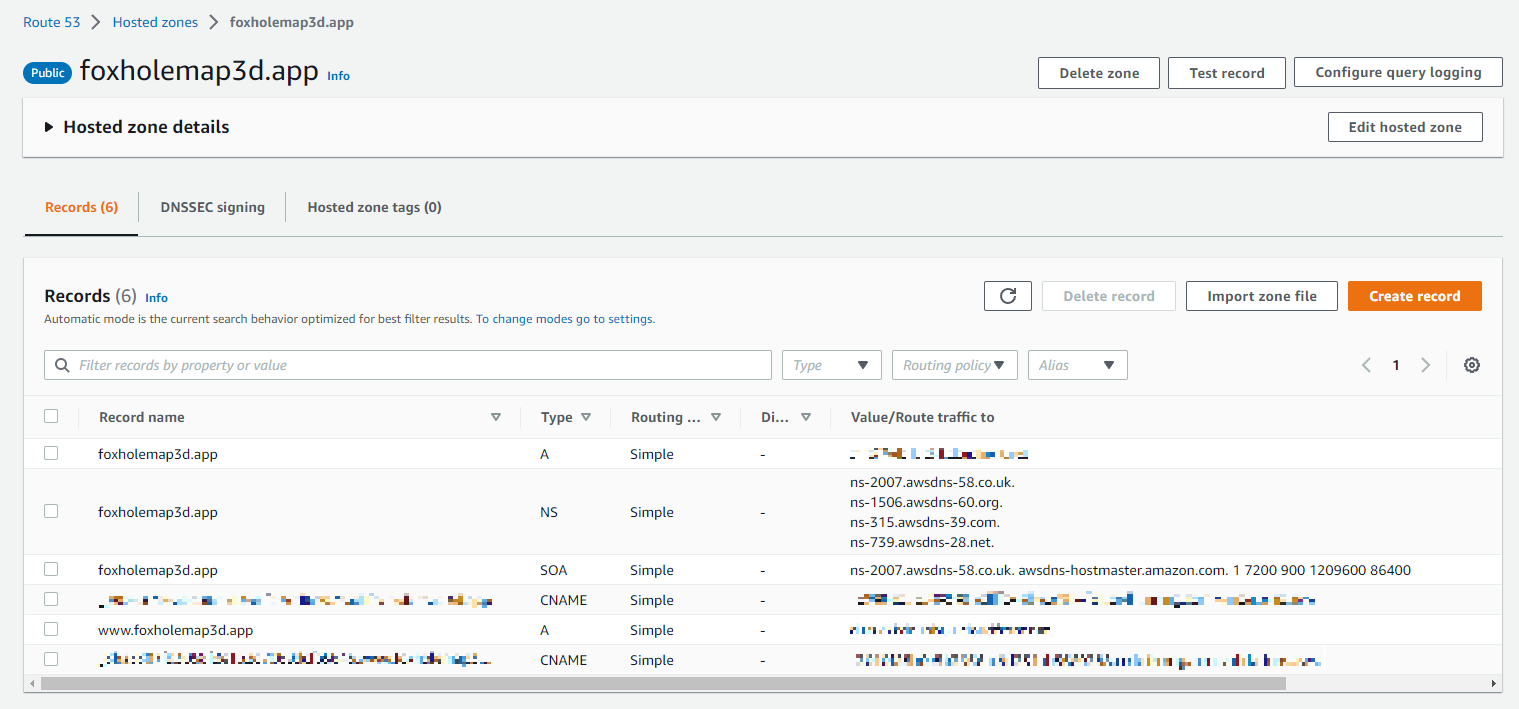
Now click on your hosted zone.
Your Records should look like the following, except you should be missing the CNAME and A records.
In a new tab go to the Google domains site. Click on your domain.
In the left-hand side click on DNS to open up the DNS tab. Select “Custom name Servers”
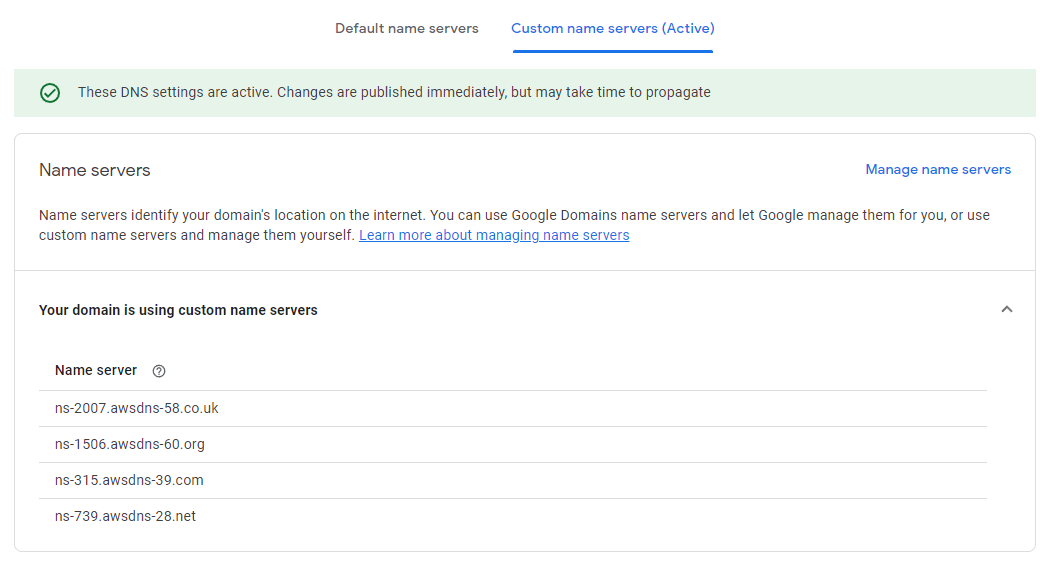
Add all of the NS values from Route 53 to your custom name servers.
Your Google domains page should look like this now:
Now the Domain registrar has your name servers. These name servers hold all the other information about your domain. So Google knows where to look to find the information about your website.
Set up SSL certificates
In a new tab, go to AWS Certificate Manager dashboard.
Click “Request” to request a new certificate.
Request a public certificate and click “next”
Enter your domain name as the domain name.
Select DNS validation. Click “Request” Open your newly created certificate and click “Create records in Route 53”

Return to Route 53. You should now have your CNAME records.
I don't fully understand SSL, just know that the CNAME record is similar to an A record in that it tells the DNS where to look for something. In this case it points to your SSL certificates.
Set up Cloudfront CDN
In a new tab go to the AWS cloudfront dashboard.
Click “create distribution”
For the origin domain, select your primary S3 bucket.
Scroll down to “Default cache behavior”, in “Viewer protocol policy” select Redirect HTTP to HTTPS.
Scroll down to Settings. In custom ssl certificate, select the certificate we just created.
Create the distribution.
The CDN is a set of caches that are distributed globally at AWS datacenters. When a user accesses your website, they will access the cache instead of your S3 bucket. This means that you'll save money on S3, and your users will have faster acccess. CDNs can also protect you from DDoS attacks.
For your website to use the CDN though, we need to tell the DNS to point your users to the CDN instead of your website.
Point A Records to CDN
Return to route 53.
Create Record, Record type A.
Toggle the “alias” switch.
In the “Route traffic to” dropdown, select “Alias to cloudfront distribution”.
Select the distribution you just created as the destination.
Create the record.
Repeat the previous step, but with www as the subdomain.
Congratulations! You now have a static website hosted with SSL and served with a DNS!